
Plastering a wall with pre-mixed mortar is an operation that requires precision and attention, but which can be successfully carried out by experts. In this article, we will see step by step how to plaster a wall with pre-mixed mortar, following some simple tips and instructions.
Video for the article at the bottom of the page
What is premixed mortar?
Premixed mortar consists of a mixture of sand, cement and additives that make it more durable and easier to apply. Before use, it must be mixed with water to obtain a smooth and homogeneous consistency. The amount of water used depends on the type of mortar and the manufacturer’s instructions. It is generally recommended to add water gradually until you have a paste that is easy to apply but not too runny.
How to prepare a wall to apply mortar
To properly prepare the wall for the application of mortar, you must first remove the remains of old plaster or paint. It is also important to level the wall surface and thoroughly clean it to ensure optimal adhesion of the mortar. It is advisable to use a stiff brush or a brush with stiff bristles to remove all dirt from the wall and then wipe with a damp cloth to remove any traces of dust or dirt. Once the wall is completely clean and dry, you can apply the mortar.
How to plaster a wall with pre-mixed mortar
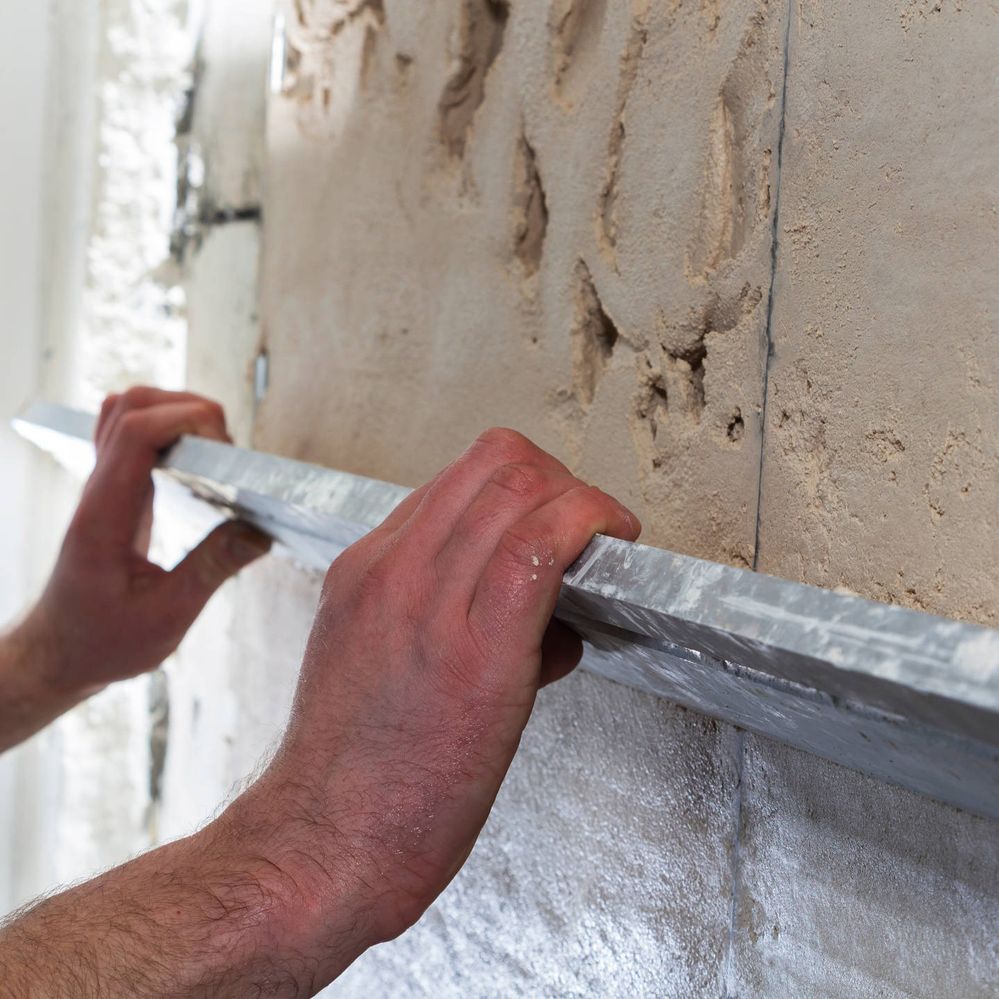
Once the mortar is ready, you can apply it to the surface of the wall. It is important to work evenly and with smooth movements, using a trowel or trowel to spread the mortar over the wall. It is advisable to work on small areas at a time to prevent the mortar from drying out before leveling and finishing.
When applying, it is important to pay attention to the consistency of the mortar and its adhesion to the wall. If the mortar dries too quickly, you can add a little water to make it more fluid. If the mortar does not adhere well to the wall, a primer can be used to increase adhesion.
Once the mortar is applied to the wall surface, it must be leveled and finished. You can use a trowel or trowel to smooth the mortar and make it uniform on the surface of the wall. It is important to work carefully and precisely so that the end result is smooth and homogeneous.
Finally, after application and completion, the mortar must be allowed to dry completely. Premixed grout usually takes about 24 hours to dry completely, but drying time can vary depending on environmental conditions. It is important not to touch or interfere with the mortar during the drying process in order not to reduce its final quality.
Advantages of plastering a wall with pre-mixed mortar

Plastering a wall with pre-mixed mortar has several advantages over other plastering methods.
- Ease of use: The pre-mixed mortar is ready to use with the correct amount of water and the necessary ingredients. This means you don’t have to measure and mix ingredients, saving time and effort.
- Better quality: premixed mortars are manufactured industrially, which guarantees greater uniformity of composition and quality. This translates into greater durability and resistance of the plaster over time.
- Better Adhesion: The pre-mixed mortar is designed to adhere firmly to the wall without sliding or peeling. This makes plastering easier and safer and reduces the risk of mistakes or falling material.
- Lower costs: Using pre-mixed mortar can reduce the overall cost of plastering as it requires less time and labor than other techniques. In addition, the increased uniformity and quality of the mortar can reduce the need for short-term repairs or maintenance.
- Faster speed: Premixed mortar is ready to use and can be applied quickly and efficiently, reducing processing time. This means plastering work can be completed more quickly, reducing the impact on project turnaround time.
Illustrative video: